next up previous contents
Next: About this document ... Up: APPENDIX Previous: DIARY OF OPERATIONS   Contents


POSITIONING MAPS OF MOST RELEVANT OPERATIONS AT SEA

Figure 10: IONCA01 positioning data.
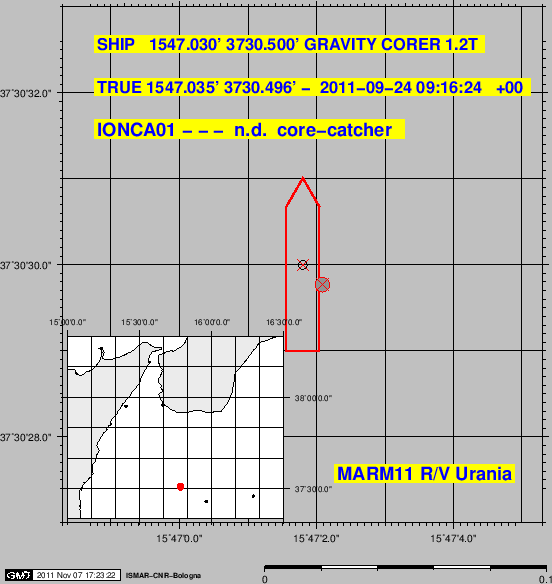
\begin{figure}\centerline{\epsfig{file=IMG/IONCA01.eps,width=\linewidth}}
\end{figure}

Figure 11: IONCA02 positioning data.
\begin{figure}\centerline{\epsfig{file=IMG/IONCA02.eps,width=\linewidth}}
\end{figure}

Figure 12: IONCA04 positioning data.
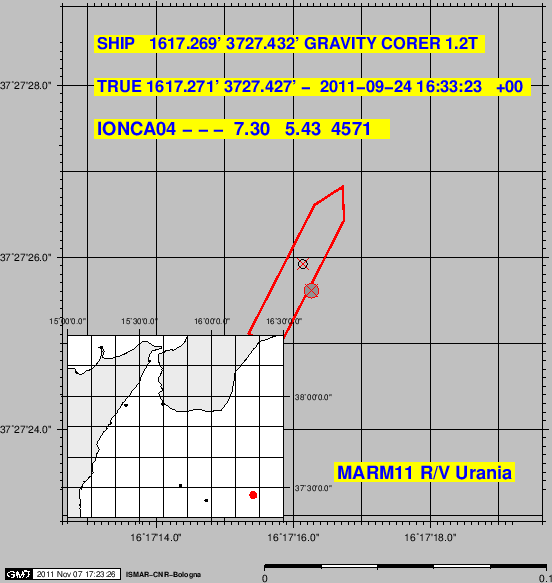
\begin{figure}\centerline{\epsfig{file=IMG/IONCA04.eps,width=\linewidth}}
\end{figure}

Figure 13: IONCA05 positioning data.
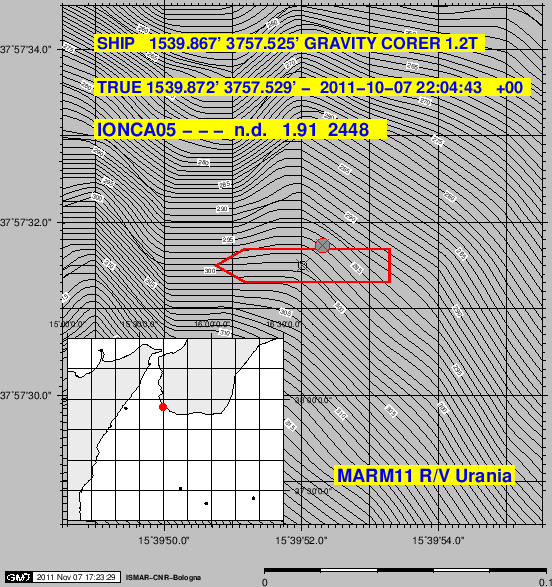
\begin{figure}\centerline{\epsfig{file=IMG/IONCA05.eps,width=\linewidth}}
\end{figure}

Figure 14: IONCA06 positioning data.
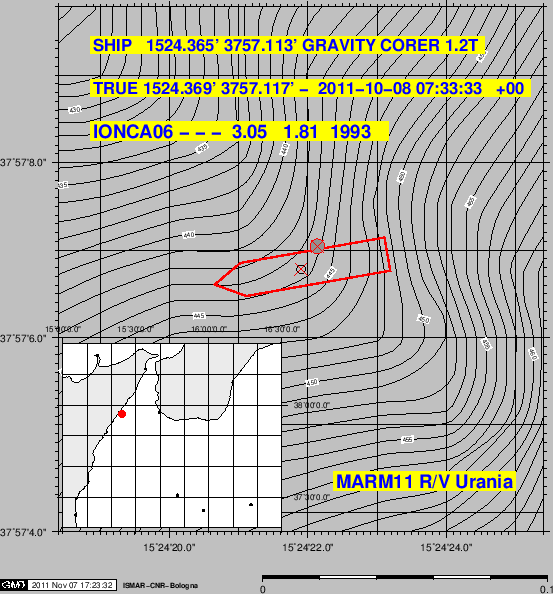
\begin{figure}\centerline{\epsfig{file=IMG/IONCA06.eps,width=\linewidth}}
\end{figure}

Figure 15: SAG01 positioning data.
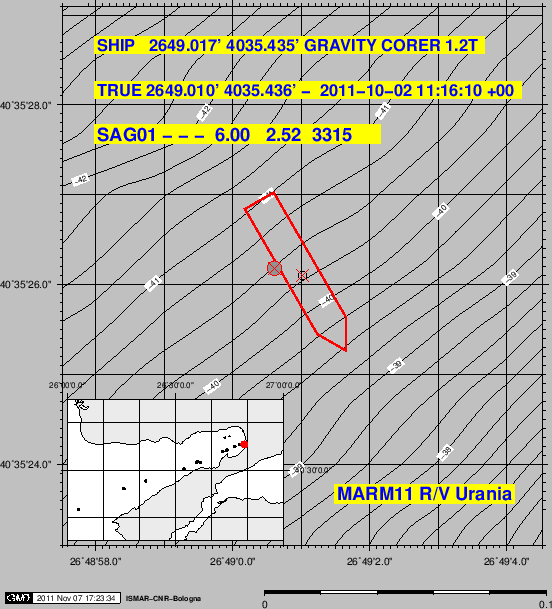
\begin{figure}\centerline{\epsfig{file=IMG/SAG01.eps,width=\linewidth}}
\end{figure}

Figure 16: SAG02 positioning data.
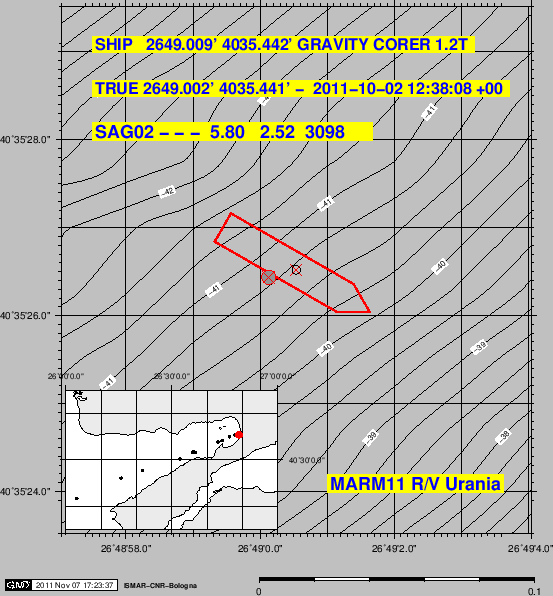
\begin{figure}\centerline{\epsfig{file=IMG/SAG02.eps,width=\linewidth}}
\end{figure}

Figure 17: SAG03 positioning data.
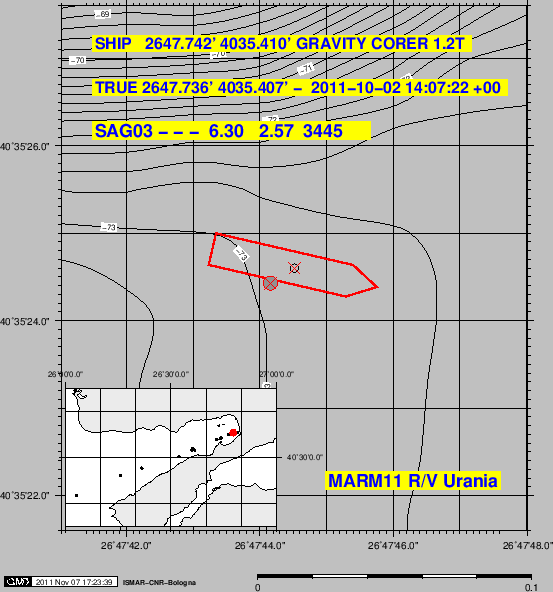
\begin{figure}\centerline{\epsfig{file=IMG/SAG03.eps,width=\linewidth}}
\end{figure}

Figure 18: SAG04 positioning data.
\begin{figure}\centerline{\epsfig{file=IMG/SAG04.eps,width=\linewidth}}
\end{figure}

Figure 19: SAG05 positioning data.
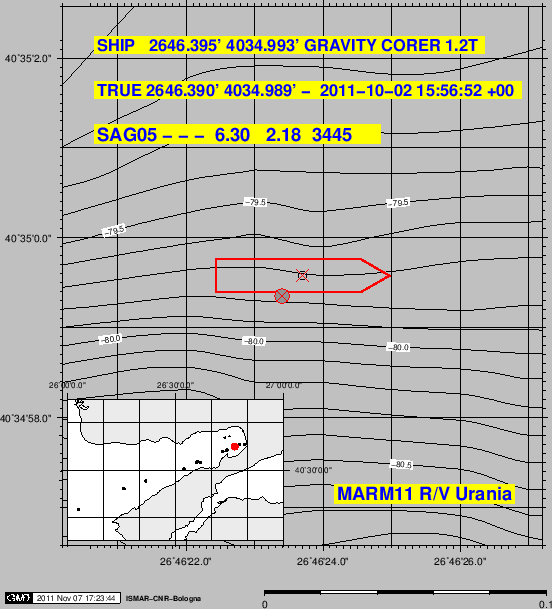
\begin{figure}\centerline{\epsfig{file=IMG/SAG05.eps,width=\linewidth}}
\end{figure}

Figure 20: SAG06 positioning data.
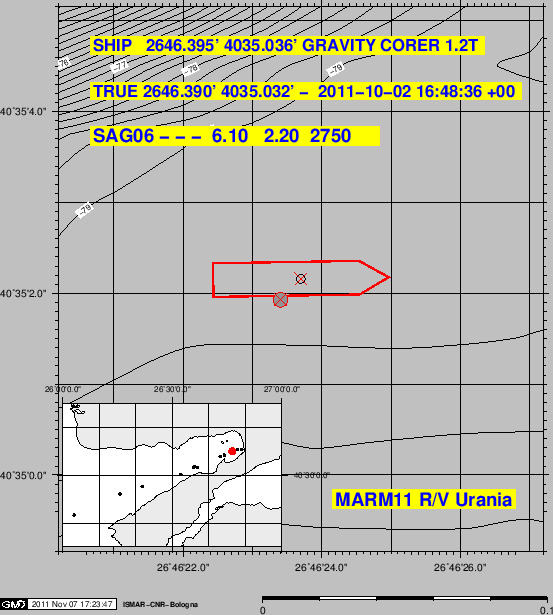
\begin{figure}\centerline{\epsfig{file=IMG/SAG06.eps,width=\linewidth}}
\end{figure}

Figure 21: SAG07 positioning data.
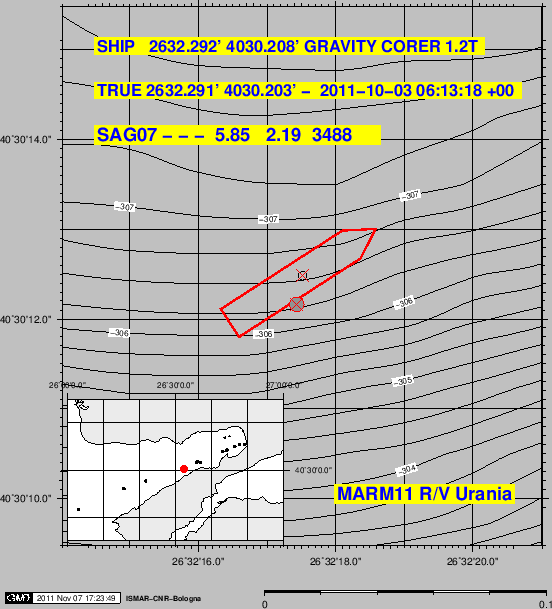
\begin{figure}\centerline{\epsfig{file=IMG/SAG07.eps,width=\linewidth}}
\end{figure}

Figure 22: SAG08 positioning data.
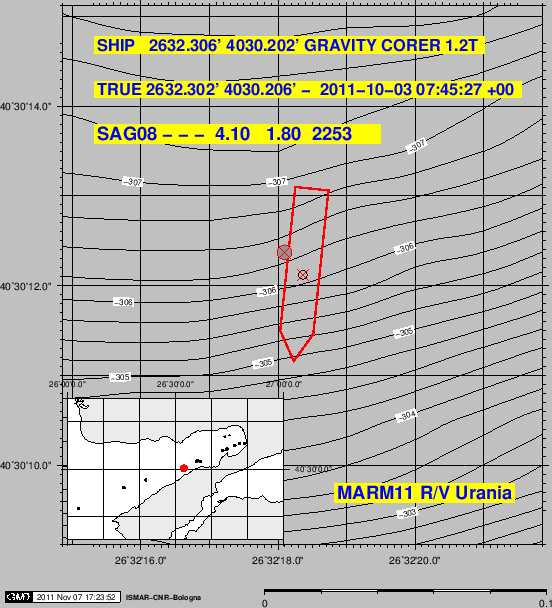
\begin{figure}\centerline{\epsfig{file=IMG/SAG08.eps,width=\linewidth}}
\end{figure}

Figure 23: SAG09 positioning data.
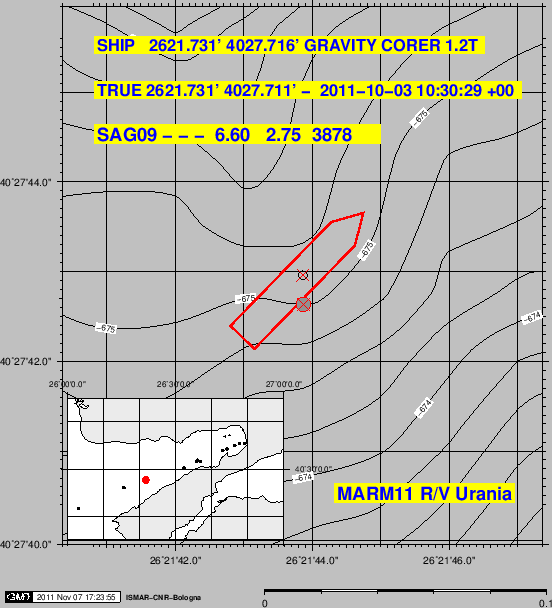
\begin{figure}\centerline{\epsfig{file=IMG/SAG09.eps,width=\linewidth}}
\end{figure}

Figure 24: SAG10 positioning data.
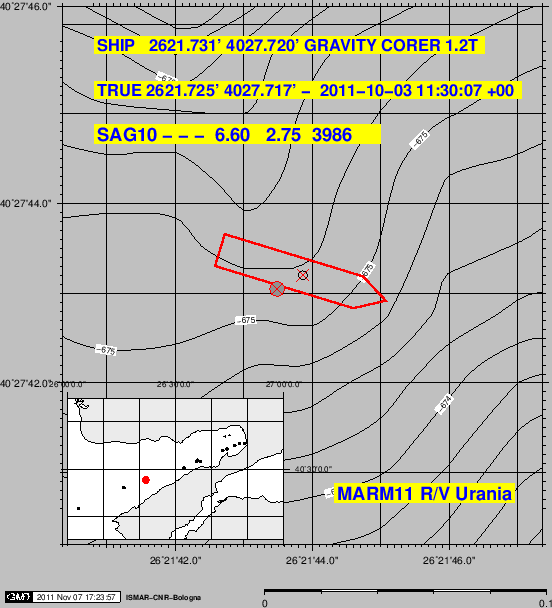
\begin{figure}\centerline{\epsfig{file=IMG/SAG10.eps,width=\linewidth}}
\end{figure}

Figure 25: SAG11 positioning data.
\begin{figure}\centerline{\epsfig{file=IMG/SAG11.eps,width=\linewidth}}
\end{figure}

Figure 26: SAG12 positioning data.
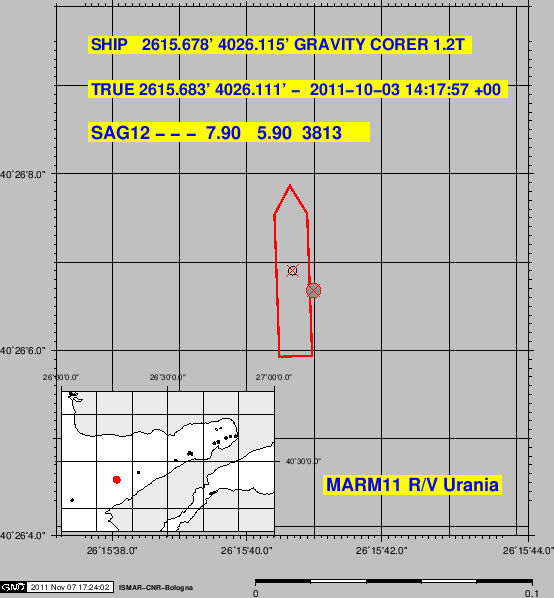
\begin{figure}\centerline{\epsfig{file=IMG/SAG12.eps,width=\linewidth}}
\end{figure}

Figure 27: SAG13 positioning data.
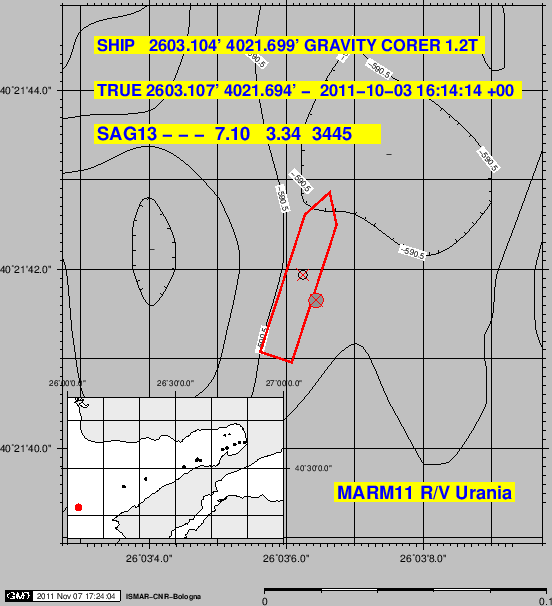
\begin{figure}\centerline{\epsfig{file=IMG/SAG13.eps,width=\linewidth}}
\end{figure}

Figure 28: SAG14 positioning data.
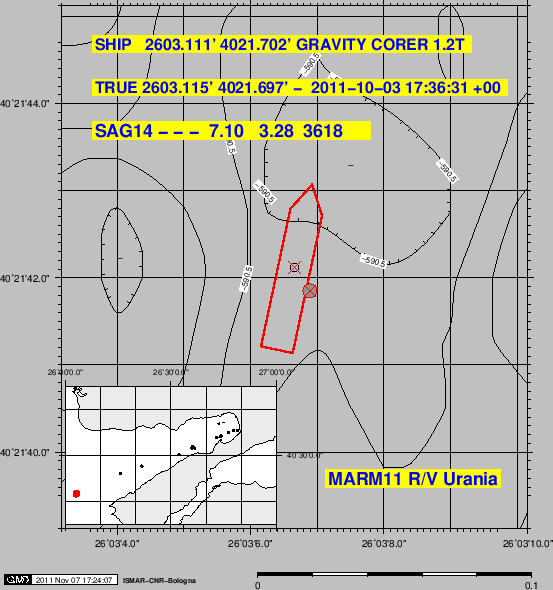
\begin{figure}\centerline{\epsfig{file=IMG/SAG14.eps,width=\linewidth}}
\end{figure}

Figure 29: SAG15 positioning data.
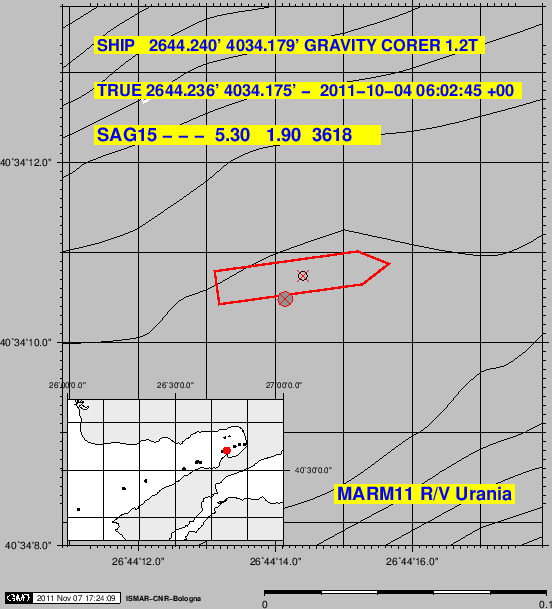
\begin{figure}\centerline{\epsfig{file=IMG/SAG15.eps,width=\linewidth}}
\end{figure}

Figure 30: SAG16 positioning data.
\begin{figure}\centerline{\epsfig{file=IMG/SAG16.eps,width=\linewidth}}
\end{figure}

Figure 31: SAG19 positioning data.
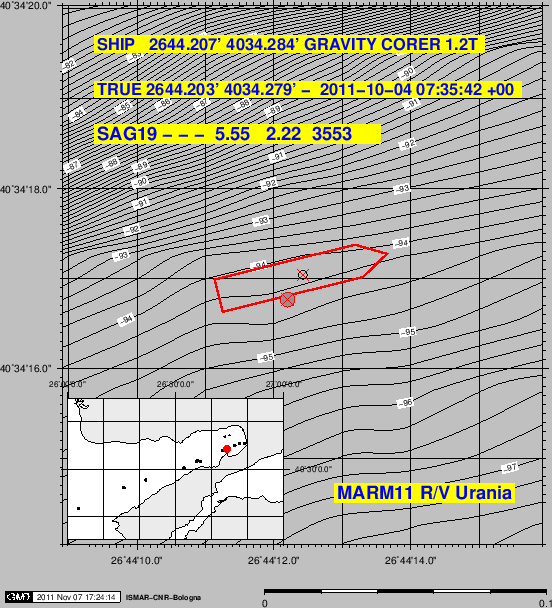
\begin{figure}\centerline{\epsfig{file=IMG/SAG19.eps,width=\linewidth}}
\end{figure}

Figure 32: SAG20 positioning data.
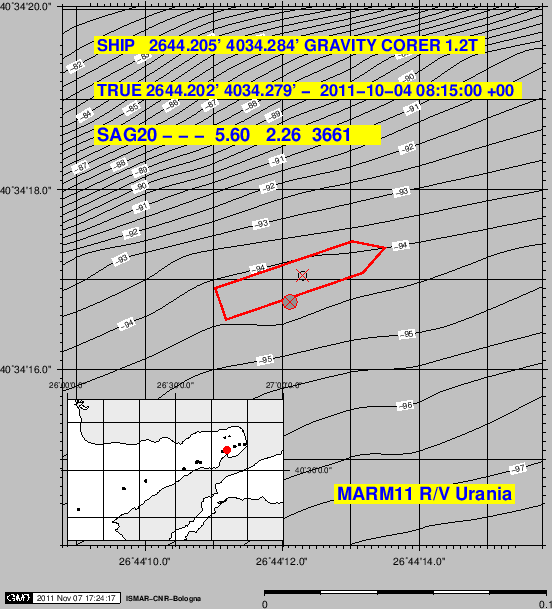
\begin{figure}\centerline{\epsfig{file=IMG/SAG20.eps,width=\linewidth}}
\end{figure}

Figure 33: SAG21 positioning data.
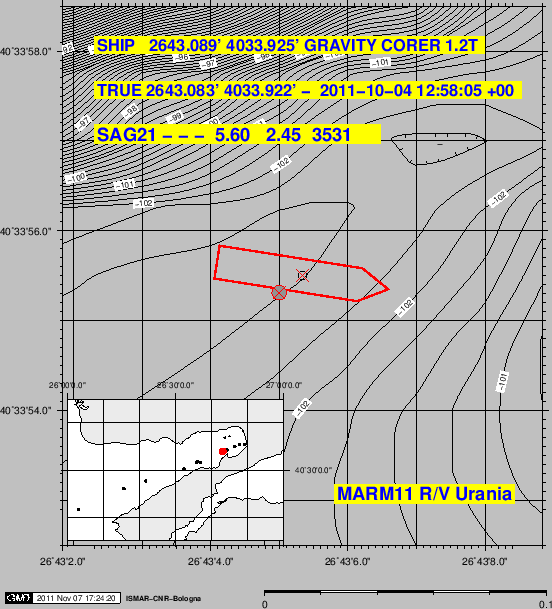
\begin{figure}\centerline{\epsfig{file=IMG/SAG21.eps,width=\linewidth}}
\end{figure}

Figure 34: SAG22 positioning data.
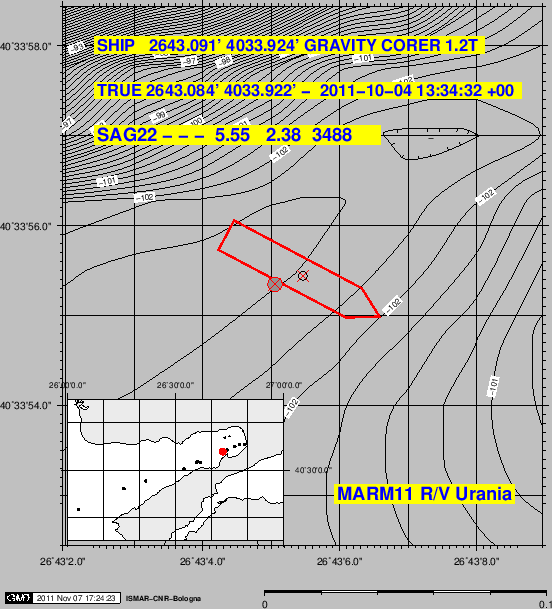
\begin{figure}\centerline{\epsfig{file=IMG/SAG22.eps,width=\linewidth}}
\end{figure}

Figure 35: SAGR01 positioning data.
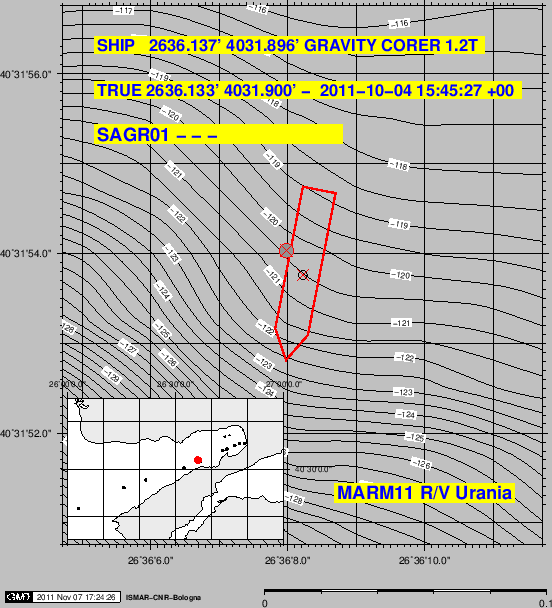
\begin{figure}\centerline{\epsfig{file=IMG/SAGR01.eps,width=\linewidth}}
\end{figure}

Figure 36: SAGR02 positioning data.
\begin{figure}\centerline{\epsfig{file=IMG/SAGR02.eps,width=\linewidth}}
\end{figure}

Figure 37: SAGR03 positioning data.
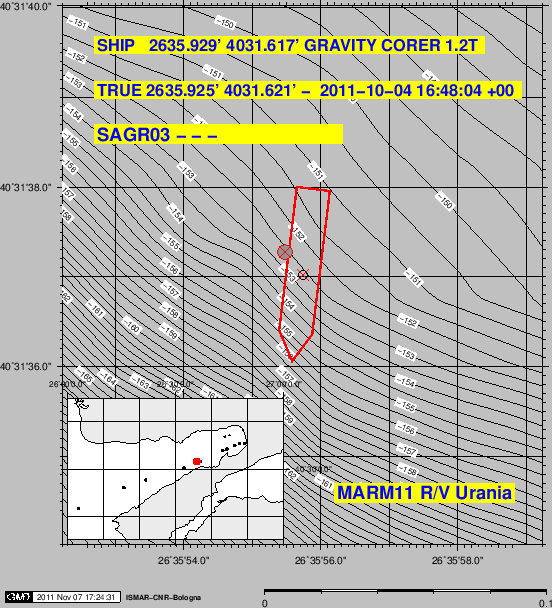
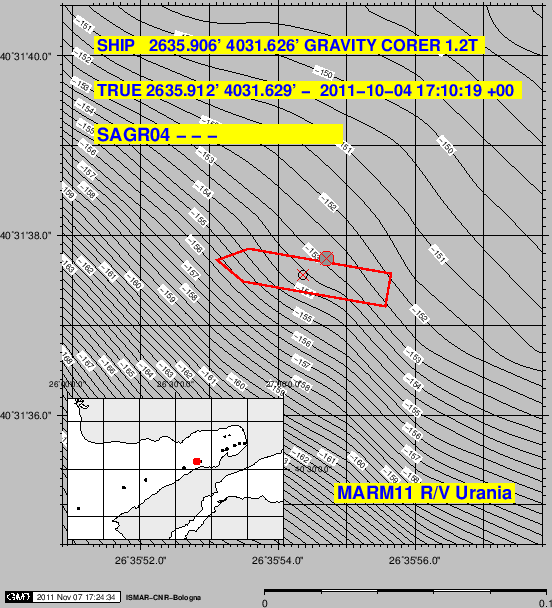
\begin{figure}\centerline{\epsfig{file=IMG/SAGR03.eps,width=\linewidth}}
\end{figure}

Figure 38: SAGR04 positioning data.
\begin{figure}\centerline{\epsfig{file=IMG/SAGR04.eps,width=\linewidth}}
\end{figure}


next up previous contents
Next: About this document ... Up: APPENDIX Previous: DIARY OF OPERATIONS   Contents
2012-11-20